Biyernes, Hulyo 26, 2013

Unit VIII : Working with Filters


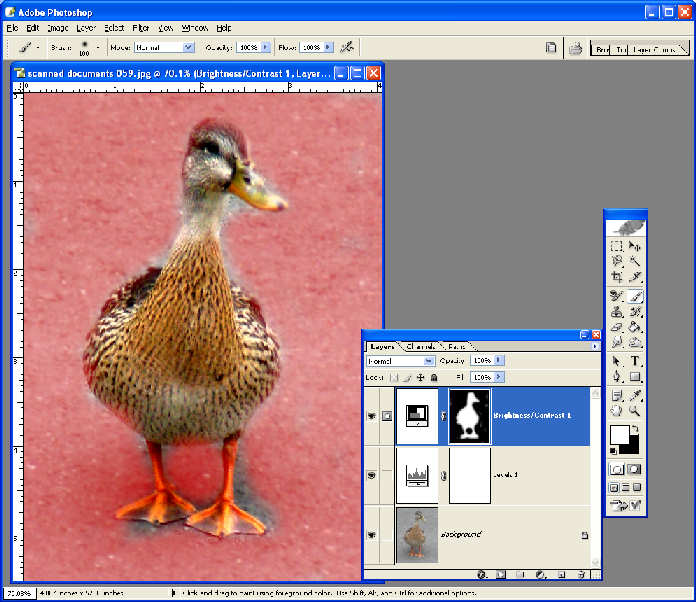
             We haven't discussed this yet so I don't have any idea about  this but I will start this with the meaning of Filters. Digital Filters are Photoshop’s built -in effects that you can apply in your image for an artistic outcome. Before, there is a need to work inside a dark room just to achieve these filter effects.  This is considered as the coolest feature of Adobe Photoshop. To apply a filter effect, just click Filter from the Menu Bar, then select from the wide variety of filters from artistic to video effects.

There are many different types of Filter :

DIFFERENT DIGITAL FILTERS
Colored Pencil Filter applied to an image will produce an image like an artistic colored pencil drawing. Dry Brush Filter applied to an image will produce a more solid color in an image. Gaussian Blur Filter lessens the quality of your image to create an artistic effect more like seeing through binoculars. Motion Blur Filter   adds a blur that has the sense of getting the picture while moving in a direction.
Ink Outline Filter makes an image form an outline of edges with black streaks. This is another Brush Stroke filter that you can use to your image.Noise Filter makes noise to that image that you uploaded in the Photoshop. It adds the graininess of the image. Render Filter  is the lighting effects filter which lets you add spotlight and other lighting enhancements to your image. Sketch Filter gives an outlining effect to your image. One example of a Sketch filter is the Charcoal filter. This imitates the charcoal material of drawing. Stylize Filter  creates styles with the same areas or the edges are being highlighted. Texture Filter  applies other patterns to your image. One example is Stained Glass Filter.


       Life without Adobe Photoshop is very hard to imagine because Adobe Photoshop helps us in many different ways like for example, restoring, editing, enhancing photos , and many more. Adobe Photoshop can also be a business because many people don't know how to use Adobe Photoshop so they let others do it and it's in the form of giving money or something. Adobe Photoshop is very important in everyone of us and it contributes in our life


This is the end of my Reflective Journal I hope you like it Sir and Thank you for reading it. Sorry for the disturbance and God Bless You :D


Unit VII : Working with Layers

      It's unit VII already there are so many things that we have learned from unit I and especially to the next unit because it is the last unit . Unit VII is all about Working with Layers but first we must know what is the meaning of Layers.


   Layers is the building blocks of the Photoshop file, making it one of the Photoshop's most powerful feature.


    Layers are like sheets of stacked acetates that you can see through that transparent areas in the window. You can see the transparent area from the layer above to the layer below.  


There are different Layer effects:
      Drop Shadow Effect that can make an image from a drop shadow so that you can make the layer looked like it has been raised off from the image canvas. Inner shadows that makes shadows within your image. Outer and Inner Glow that makes the outer glow effect adds faint color to the outside of your image, while inner glow can make your image glow inside the area of your image.And Bevel and Emboss that bevel and emboss a layer gives a 3D effect for your image.


Lastly we discussed about the ADJUSTMENT LAYERS

   Adjustment layers are adjustments that you can make to one layer instead of doing it to the whole image.Individual layers can be edited through this option.This will allow you to have more versatile layer .


These are all the lessons in unit VII : Working with Layers
Keep on reading because unit VIII awaits us :D
Thanks


Unit VI : Making Custom Images

     Unit VI is about making and inserting custom shapes in our canvass.  The first step is to click the Shape Tool in the Tools Palette . After performing this action , a drop down menu will appear . At the bottom of the drop down menu , you will see the Custom Shapes Tool . This will let you choose a wide variety of predefined shapes .


   And we also learned about the differences of the Brush , Pencil and Paint Bucket tool. The Brush tool lets you create color in your image or raw image , the Pencil Tool gives you color strokes just like the brush but the lines are thinner while Paint Bucket Tool is good for replacing colors or by changing the background of your image.

Now we know that eventhough they are all alike still there is still some differences in each tool.

This is the end of Unit VI, that's all 
Thank You :D

Unit V : Importing and Editing Images

We discussed about importing and editing images and I learned that there ways in creating an image canvas.

         File > New – after you fill out the desired size and resolution in the New dialog box , Photoshop confronts you with a white , empty canvass .File > Open – open an image saved to hard disk by choosing Open File Menu . Edit > Paste – This allow you to copy an image from different application or in Photoshop . And the last File > Import – if you own a digital camera or scanner , it may include a plug-in module that lets you transfer an image directly into Photoshop .


       There are photo restoration tool in Adobe PhotoShop that we can use to make our photo like new.
       Some of this are : Clone Stamp Tool lets you paint a portion of your image .  The Spot Healing Brush tool removes blemishes and objects . The Healing Brush tool paints with a sample or pattern to repair imperfections in a image. The Patch tool repairs imperfections in a selected area of an image using a sample or pattern. The Red Eye tool removes the red reflection caused by a flash. The Pattern Stamp tool paints with part of an image as a pattern. The Eraser tool erases pixels and restores parts of an image to a previously saved state. The Background Eraser tool erases areas to transparency by dragging.The Blur tool blurs hard edges in an image. The Sharpen tool sharpens soft edges in an image. The Smudge tool smudges data in an image. The Burn tool darkens areas in an image. The Sponge tool changes the color saturation of an area .


These are the things that I learned in this unit and now I can restore some old photos of my family :D


Unit IV : Working with Fonts

                 This unit is all about fonts . In advertisement poster , text should be present because it is the one that gives information to your endorsed product or whatsoever. The first thing that you should consider is that your slogan should be attractive to the viewer’s eye. The text must work well together with the background’s color and other objects in your poster . You must integrate a text in your poster because , as I said earlier , it gives information to the product/service that you are endorsing . If the text is very good , expect that you will attract a big number of costumer .

         We need  to integrate text in our visual designs particularly in advertisement posters because it will be the one that will tell the details about your advertising products. The text will be the one to speak for your product. The text can also be the identification of or products.
           We can create artistic and creative text by using the Photoshop.  We can use the different type of text tools like horizontal and vertical text tool and the type in the path also to make your  design more attractive and use a appropriate color blend. We can also use the text wrap  to make it more beautiful’
            We must also think about our concept and do it artistically. And when you’re doing something, put your heart there and enjoy what your doing to be more successful and you must do things happily in order to make all things right and almost perfect.


         There are four kinds of Type Tool:
         Choose what kind of text you want and now we can create our desired design of text


We can also warp our text.
To add just go to the Menu Bar, click Layer > then Type > then warp text. A set of icons will appear.
This is the end of Unit IV and I've learned so many cool ways in making my text more awesome.
Like this :


UNIT III : Introduction to PhotoShop CS3

                  Photoshop is very powerful because nothing is impossible to it when it comes to images. Photoshop can restore photos even if it is old or have some defects like scratches, dusts, and others. Photoshop sometimes makes dreams come true in terms of using a photo or a picture. You can edit images and transform them whatever you’d like too. With it, we can create a stunning illustrations and we an also manage our photo.

             I think the features that make Photoshop the most popular graphic editing application are the layer,  the restoration, enhancement, and the selection tools. With the layer, you can integrate the pictures without damaging the image. Layer helps you to create new image not to do harm with it. The restoration tools help us to restore images to their original form when it has been damaged or has any problem. Enhancement tools help us to make our image more beautiful. We use selection to work in a specified area, while not altering any of the area around it. So you can move and change a place on your picture without affecting any part of it.

I hope the new edition of Adobe Photoshop can do even more great things.
Thank you Sir for teaching us how to use Adobe Photoshop.

Unit II : Introduction to Creative Design

       
          Whenever I hear the word Creative Design, I always get nervous because I'm not really good in designing and I am also not creative but when Mr. Marlon taught us about this, I learned how to make my images be beautiful, colorful and alive by using the elements ( line, shape, form, texture, space and color) and the principles (balance, unity, rhythm, emphasis, movement, pattern and proportion) of design.
           We can apply the elements of designs in designing an advertisement poster  by using the colors, lines, shape, texture, etc. correctly. We must use attractive colors or combinations of colors and the value of it to make our poster beautiful. The texture must be visualized by the darkness and lightness or value/tone of the color that we will use.

            We can apply  the principles of design in designing  an advertisement poster by balancing the objects that you will draw or use, the darker the shape, the heavier it appears to be. Using opposing elements like opposite colors in the color wheel and opposite directions like horizontal an vertical will make our poster more interesting. We must use related elements like adjacent colors and similar shape to give our poster harmony. If we do not use the principles and elements of designing correctly and perfectly, our work will be destroy and there will be no unity.

             In this advertisement poster, the elements and the principles are properly used. The image shown will attract the viewer especially a child because it looks like very fun and delicious .The color used in the font really matched with the background and therefore the use of color is great.              


There is so many things that I learned from here and after this lesson, I like to make few more poster to test myself if I really learned something. Thank You Sir